DAGGERFALL ONLINE · QUICK START
Daggerfall Online beginner guide:
your first adventure.
New to DFO Online (dfoonline)? Follow the download, import and multiplayer steps. Keep this guide beside your game.
Multiplayer is playable. Load your files, create an online character and meet friends. Multiplayer screenshot guide ↗
Step 1 of 6 · Download
STEP 1 · WHAT TO DO
Get the game files
- Download DaggerfallGameFiles.zip using the link below.
- Wait for the download to finish. Keep the ZIP for future imports.
What happens nextYou have DaggerfallGameFiles.zip on your device.
Download → save → keep
No Unity editor needed.A GitHub source ZIP is not the game data.
Need more detail?
The browser engine and the original game files are two different things. This website provides the DFO Online browser client; you provide the maps, models, textures and sounds in the ARENA2 folder. A GitHub source-code ZIP cannot replace those files.
Start on a computer with a keyboard, mouse and WebGL2-capable browser. You do not need the Unity editor or the desktop Daggerfall Unity application. Keep room for both the downloaded archive and browser data. Already have a complete ARENA2 folder? Skip to step 3.
Multiplayer is playable. Use this guide for the files and controls, then follow our illustrated multiplayer guide to create an online character, invite your friend and meet outside.
Choose Download game files below and save DaggerfallGameFiles.zip somewhere you can find again. This is an external Google-hosted download of the package linked by Daggerfall Unity’s installation wiki. It is game data, not an installer for this website.
Wait until the download finishes. If Google shows a confirmation, review the filename and use its Download option. If the direct link does not work, open the Google Drive file page and use Download there. A ZIP preview is not needed. For a quota or unavailable-file message, use the official instructions to check the current source; avoid unrelated download mirrors.
STEP 2 · WHAT TO DO
Choose a folder or keep the ZIP
- Computer: right-click the ZIP → Extract All → open the arena2 folder.
- Phone: keep the ZIP intact and use the ZIP picker in the next step.
- Do not open or select a single BSA. Keep all files and subfolders.
What happens nextYour complete ARENA2 folder or original ZIP is ready.
├── ARCH3D.BSA
├── BLOCKS.BSA
├── MAPS.BSA
├── WOODS.WLD
└── …all remaining files
Keep the complete folder, not just these examples.
Need more detail?
On Windows, right-click the completed ZIP and choose Extract All. Open the extracted folders until you find arena2 or ARENA2; either spelling is fine. On macOS, open the ZIP to extract it. On a phone, you can keep the ZIP intact for the game’s ZIP picker.
Select the whole ARENA2 folder. Do not double-click BSA files, rename them or unpack them individually. Keep the other files and subfolders too. The seven names below are a minimum startup check, not everything the game needs.
STEP 3 · WHAT TO DO
Import inside the game
- Open the game panel. Skip intro, finish any appearance prompt, then choose New Game → Begin.
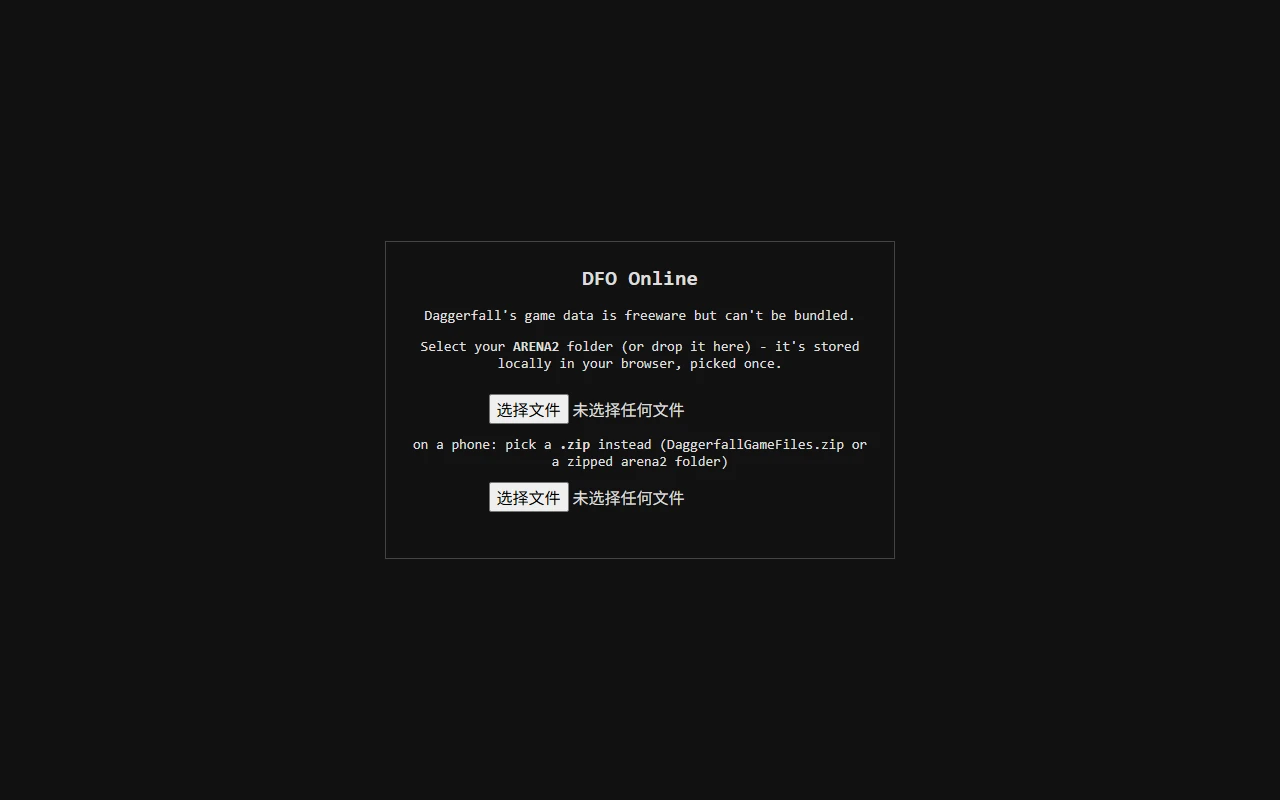
- At the data prompt: upper picker = ARENA2 folder; lower picker = ZIP. Use just one.
- Allow the import to finish and the client to reload. Keep the tab open.
What happens nextThe picker closes and character creation loads.
Need more detail?
Open the homepage game panel and press its launch button. Inside the client, use Skip intro if you want to go straight to the menu. Complete any first-run appearance prompt, then choose New Game and Begin. The file picker appears when the game needs data and none is already stored; it may not be the first screen you see.
Computer: use the FIRST file-selection control, below “Select your ARENA2 folder”, and choose the entire arena2 folder. A browser confirmation may describe this as uploading multiple files, but the intended import stores the game data locally in your browser.
ZIP or phone: use the SECOND control, below “on a phone: pick a .zip instead”, and select DaggerfallGameFiles.zip or a ZIP containing your complete ARENA2 folder. You only need one of the two controls. Wait for reading or unpacking to finish; startup may reload the game. Do not close the tab while it is importing.
If you return using the same browser profile and the data is still stored, the picker should be skipped. A new device, different browser or cleared site storage needs another import.
STEP 4 · WHAT TO DO
Make your first character
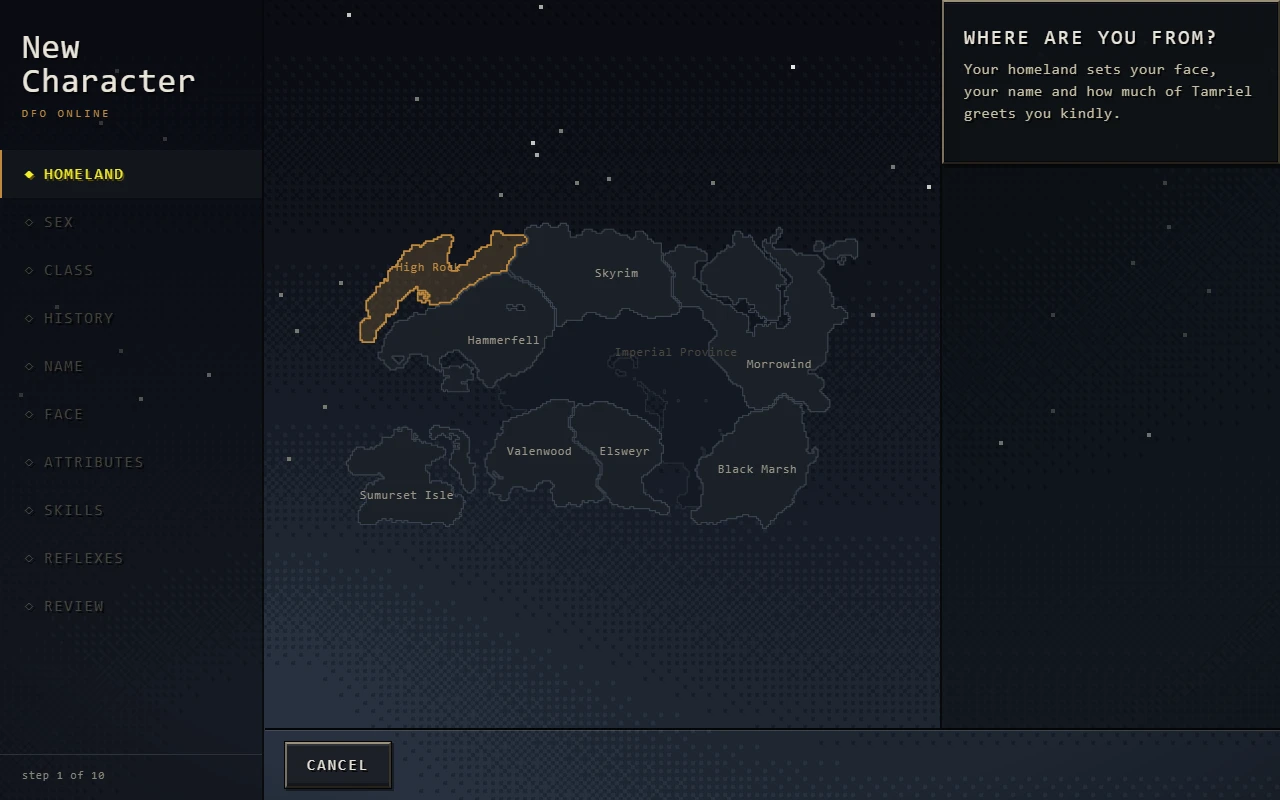
- Choose your homeland on the map.
- Follow the character steps: class, history, name, appearance and abilities.
- Review your choices. Once you reach the world, save through the game menu.
Good to knowFor multiplayer, choose Online → New online character and finish with BEGIN YOUR LIFE.
Need more detail?
The New Character screen is part of the game, not an import error. Start by choosing a homeland on the map. Follow the prompts for sex, class, history, name, face, attributes, skills and reflexes, then review your choices. Read each confirmation before continuing; you do not need to open another BSA file.
The screenshot shows Homeland, step 1 of 10. For multiplayer, start from Online → New online character, then select BEGIN YOUR LIFE at the final Review step. Once you reach the world, practise movement somewhere safe and make a save using the game’s save menu. Wait for confirmation before leaving.
STEP 5 · WHAT TO DO
Take your first steps
- Click inside the game and close menus before walking.
- Practise the controls shown here in a safe place.
- Changed bindings? Check Settings → Controls. On a phone, rotate to landscape and use the touch controls.
Good to knowYour character moves and your mouse controls the view. Use the map and combat tips below before exploring.
- Shift
- Run
- Space
- Jump
- Mouse
- Look around
- Esc
- Release pointer
Need more detail?
Click inside the game first so keyboard input goes to the game instead of the surrounding webpage. Finish or close a menu before trying to walk. These are the client’s default bindings; your saved settings can change them. Check Settings → Controls if a key behaves differently.
STEP 6 · WHAT TO DO
Meet at the same landmark
- Each player needs their own files and account. Use Online → New online character in the startup menu.
- Use this same community service. Agree on the same region, town and exact outdoor landmark.
- Send Invite to party; your friend accepts under Social → Party. Leave Privateer’s Hold separately, then meet outside.
Good to knowPrivateer’s Hold is solo, even when both players are in the same party. Meet at the same outdoor landmark.
See each other → move → chat
Party membership alone does not meanyou are in the same place.
Need more detail?
Open Online in the startup menu. If you are already in the game, save under System → Save Game, then choose Exit → Leave this game and confirm to reach that menu.
Each player needs their own local game files and a separate account on this community service. Upstream DFO Online accounts and saves do not automatically transfer.
- Each player signs in through the game’s own account screen. Do not share an account, password or recovery code with your friend.
- Open Online in the main menu and choose New online character. Complete character creation there. Bring online is restricted to eligible characters with historical online records; it is not the entry for a newly created offline character.
- Choose Play on the online character’s card once it is available. Wait for a successful connection; a disabled Play button or error needs resolving before arranging a meeting.
Both players must use daggerfall.online and its community service. Being in different towns, indoors versus outdoors, or in a solo introduction can prevent you from seeing each other. Joining a party is not proof that you are standing together.
- Exchange character names outside the game first. Agree on the same region, the same town and a precise outdoor landmark, such as the outside of a named inn’s front door. “Meet in Daggerfall” alone is too vague.
- Use the game’s map and travel controls to reach that destination. Finish travel and loading on both devices. Privateer’s Hold is a solo tutorial dungeon: each player must leave it before you can see each other outside.
- Compare the location names and both sides of the landmark. If one player is inside a building, have both return outside. Confirm both clients are online before trying anything else.
- When you can see the other character, have player A walk a short distance with W, then stop. Player B checks the movement, then repeats. Exchange a short message in the in-game chat and confirm receipt; a connection icon alone does not demonstrate synchronization.
- For a party, use the social panel’s Invite action for your friend and have them choose Accept under Party invitations. Confirm YOUR PARTY (2/8) lists both players. Party membership does not move either character to the other.
YOUR FIRST DUNGEON
Read the map. Find your bearings.
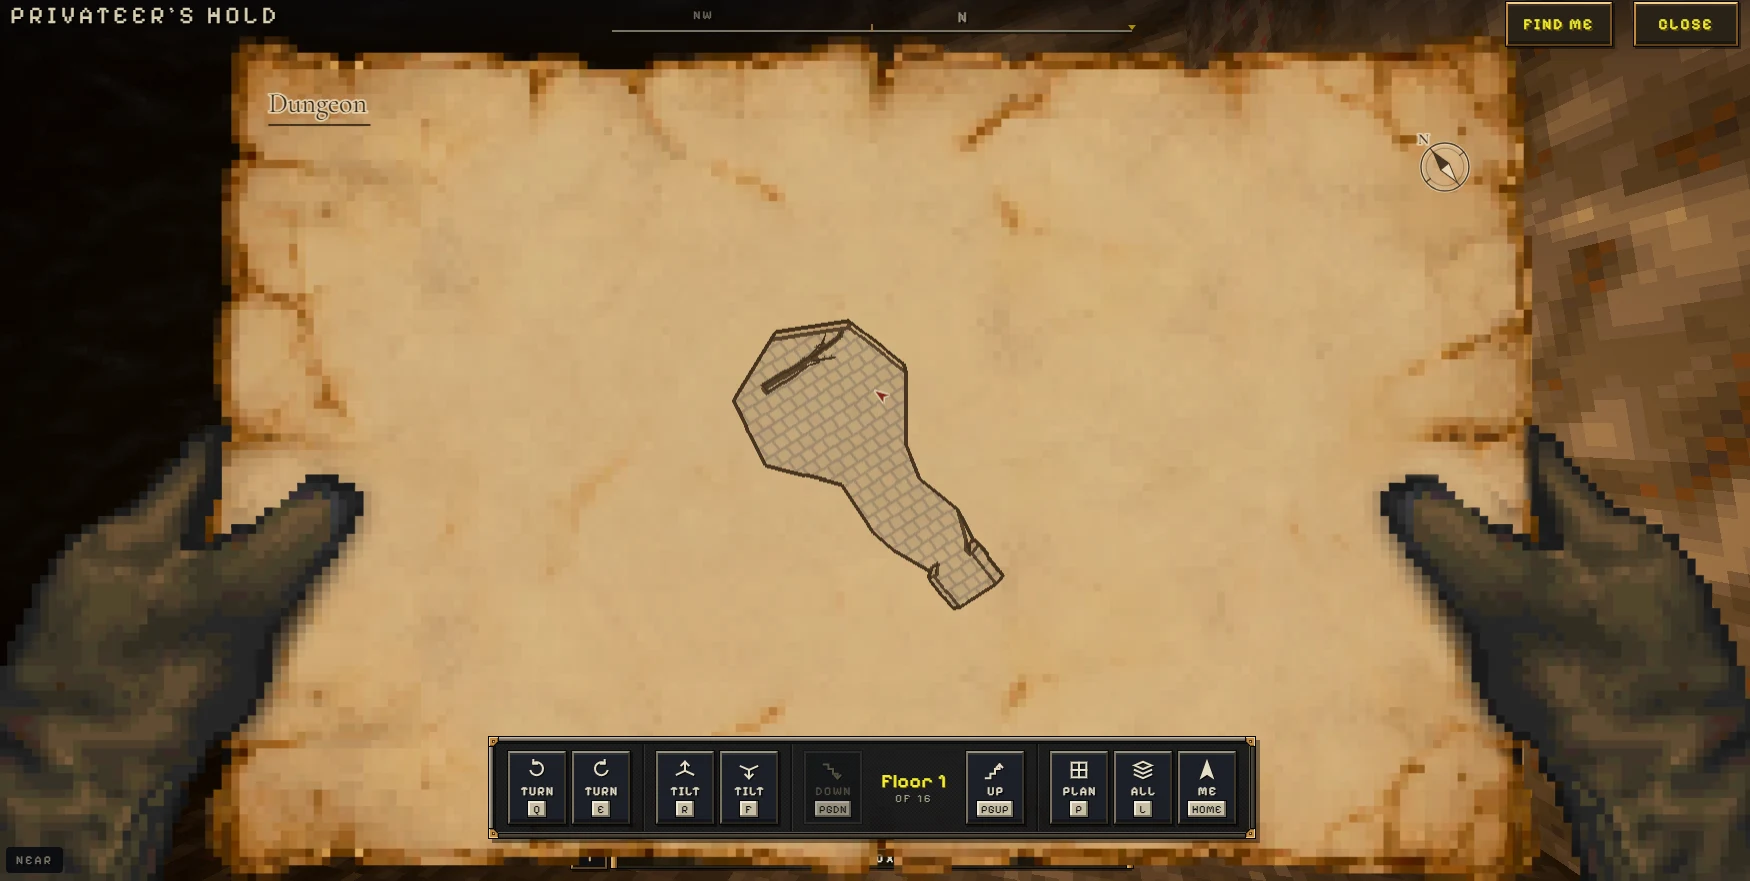
Press M to open the local map. The red arrow marks your position; this image shows an explored part of Privateer’s Hold, not a complete route to the exit.
How to use this map
- Find me / Home: recenter on your character.
- Page Up / Page Down: move between floors. Check the floor label before following a corridor.
- Q / E: rotate the map. P: plan view. L: show all floors.
- M or Close: return to the game. Online menus do not pause enemies.
A rat is attacking — how do I fight?
Close the map and face the enemy. Press Z to ready your weapon, then hold the right mouse button and move the mouse to swing. A click alone does not swing in the default gesture mode. Use Shift + W to run if you need space. Check Settings → Controls if you changed your bindings.
Why is my party member not here?
The starting dungeon is solo for each character. Chat and party membership still work, but you must each leave the dungeon and meet at the same outdoor entrance.
Follow the illustrated multiplayer steps →